Epoxy Preparation and Application Procedures
BallistiX Squire & BallistiX NCO Products
BallistiX Squire and BallistiX NCO products are for use on all concrete substrates (raw or finished/polished/grind & sealed, porous or non-porous/power troweled), pavers, natural stone, concrete terrazzo, tile and grout flooring such as slate tiles, travertine tiles, limestone tiles, and sandstone tiles, and epoxy surfaces including epoxy metallic and epoxy terrazzo. BallistiX Squire and BallistiX NCO products are not to be used on vinyl surfaces. Please refer to our BallistiX Ranger product line for vinyl surfaces.
Products Needed
- BallistiX NCO (no color enhancement, satin finish) OR BallistiX Squire (gloss finish)
- Commercial cleaner/degreaser
- IPA (Isopropyl Alcohol) 99%
Safety Equipment
- First aid kit – eyewash bottle
- Goggles
- ½ face carbon filter head respirator
- Vinyl gloves
- Red “DANGER / DO NOT ENTER” tape
- Safety barriers
- Walk off paper, rugs
- Painters visqueen
- Painters tape
Essential Equipment
- Extraction Unit with spinner, edger, pressure gun
- Pressure Washer if extraction unit not available
- Moisture detector
- Digital thermometer
- 175 RPM machine
- 80 grit concrete nylon-grit brush attachment
- Drying towels
- Air mover
- Extension pole
- Applications Applicator
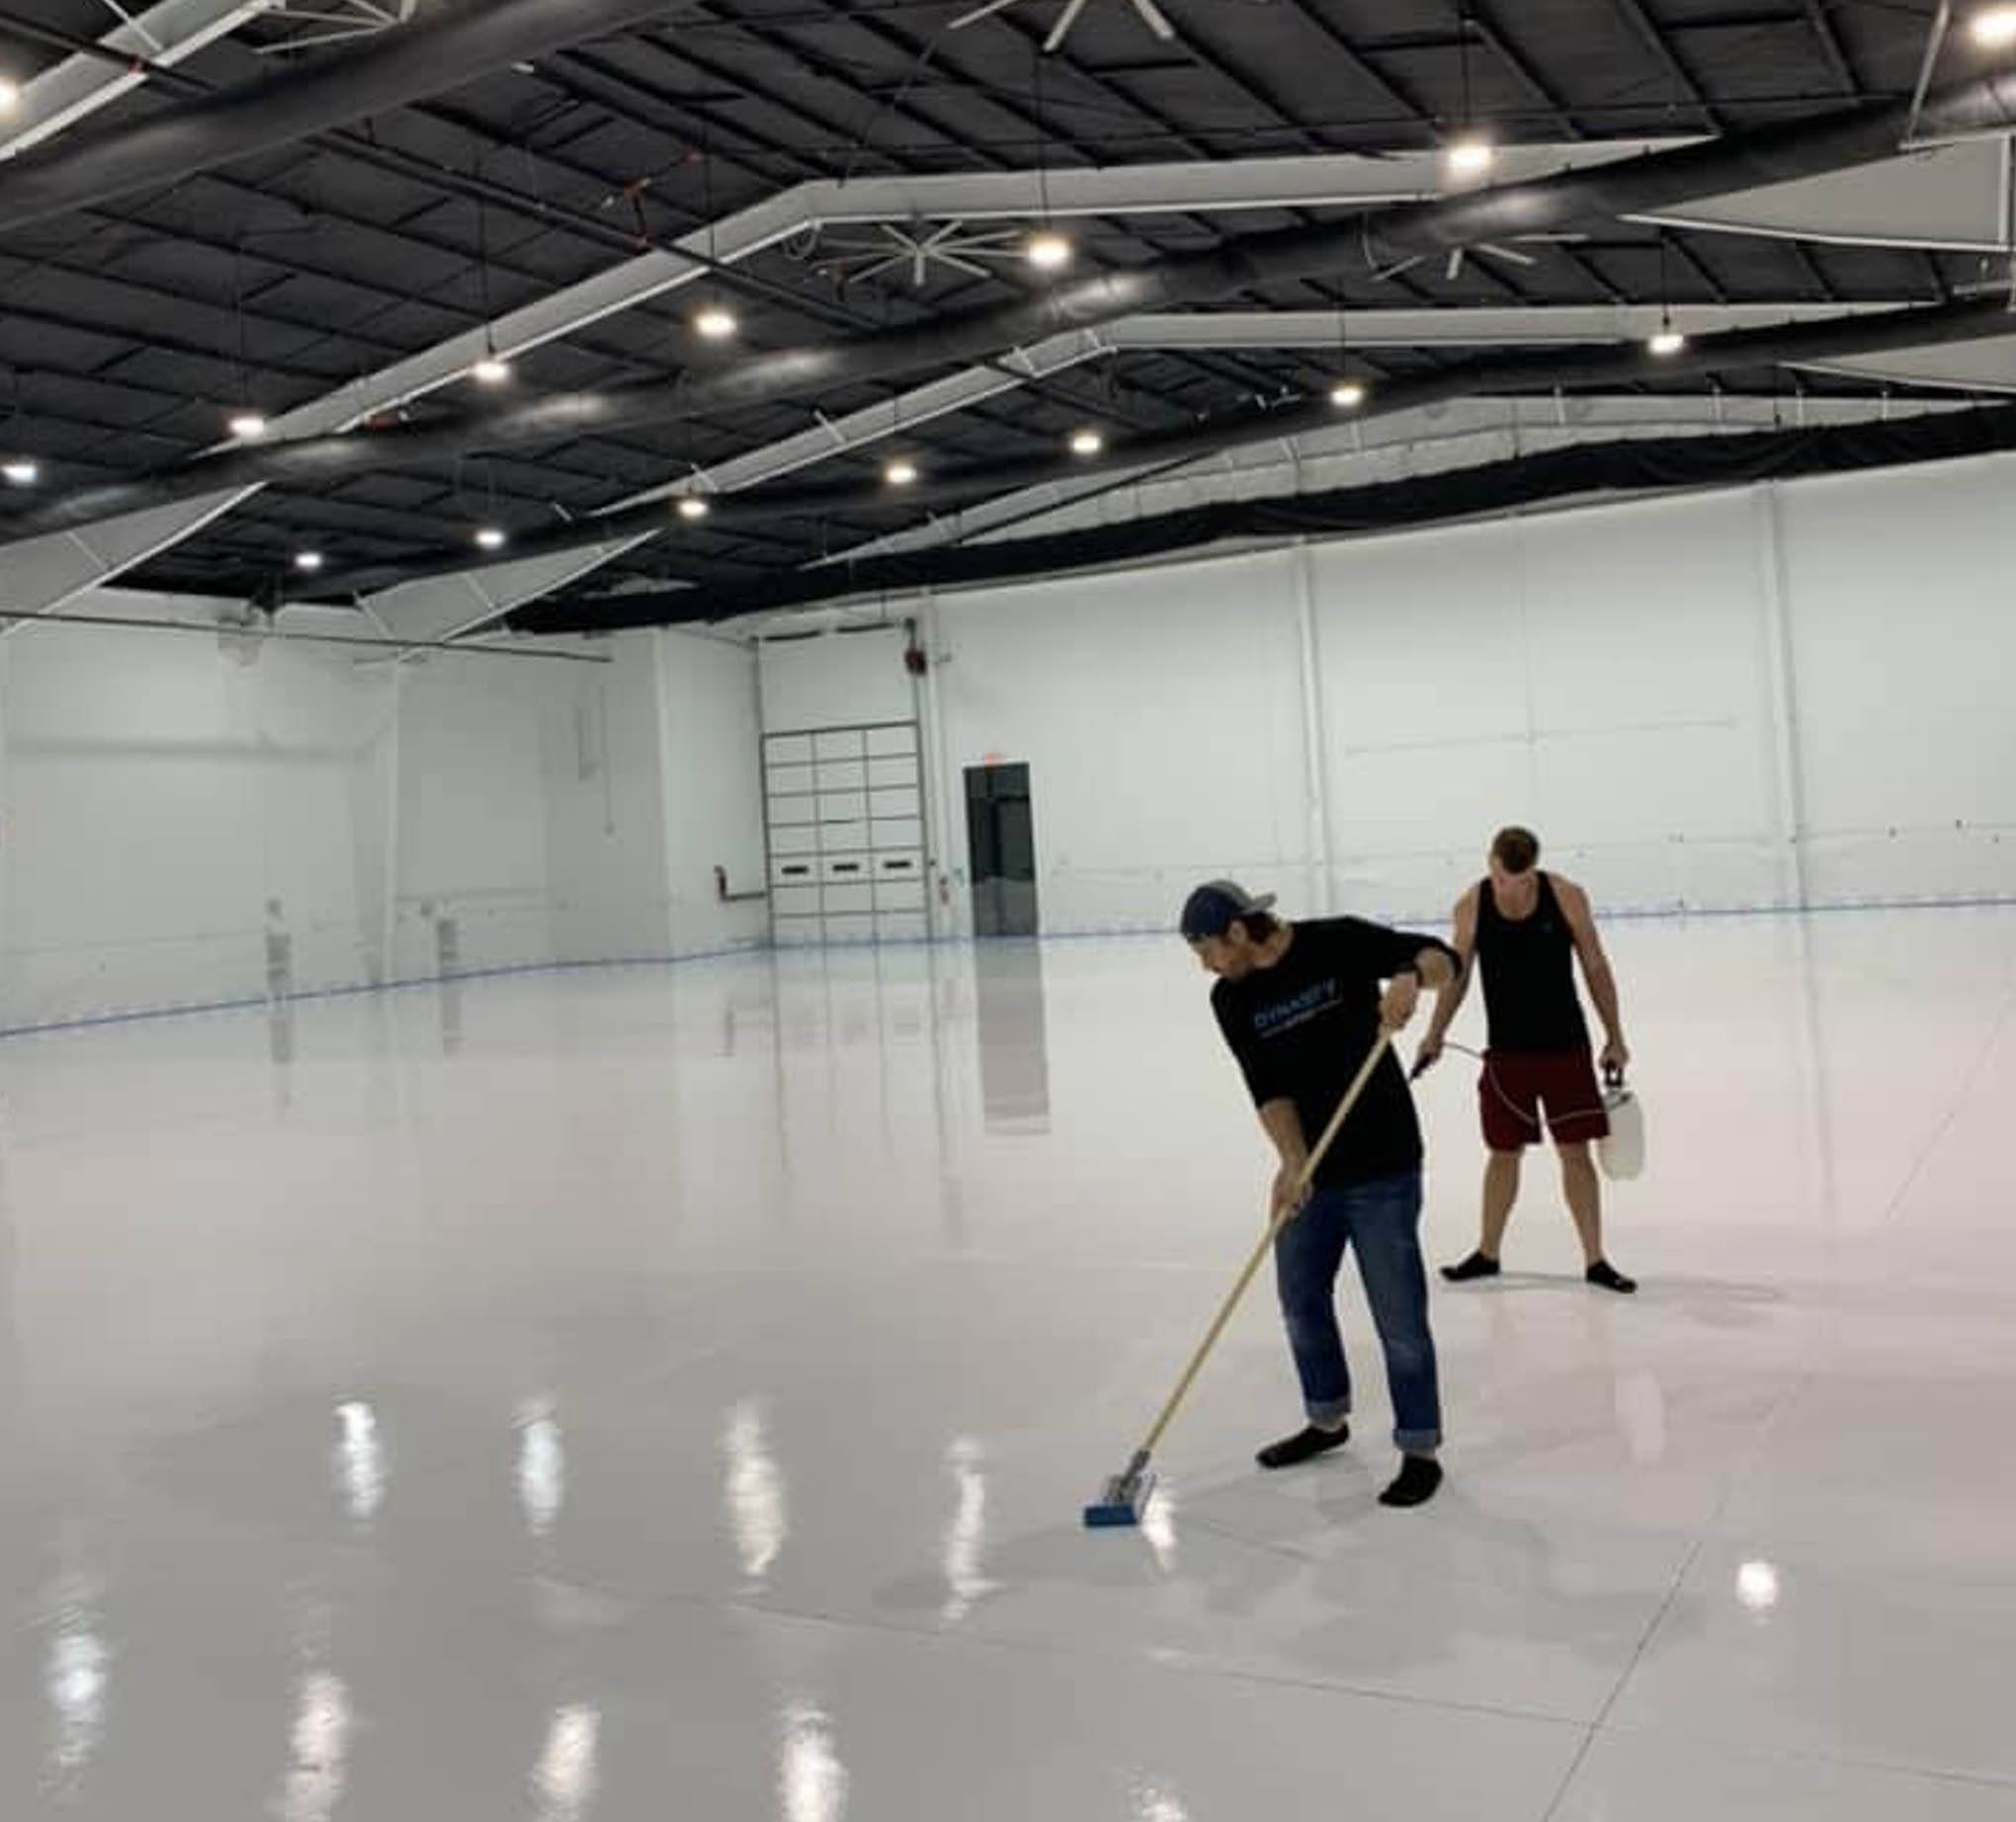
- 18” Flat mop w/microfiber pad
- Microfiber sponge towels
- Hand pump sprayer
Epoxy Procedures
1. Sanding is OPTIONAL
Ideally your finish should be 320 grit, 220 grit will work – but sanding is not recommended. If your Epoxy product is rich in solvents and byproducts, you may have to sand. Remember – this product will bond to glass. Profile is not required.
Use the appropriate pad:
- Black – Used to remediate product – equivalent to 100 GRIT DIP – Not recommended for first step of prep, as it can leave scratches.
- Blue – Most Commonly used to prep Epoxy floors with use of ISO 99 Alcohol.
- Red – Clean fine residue. Can be run dry or wet with alcohol solvent prep
- White – Used dry to buff epoxy and assist with gloss.
2. Apply with Sprayer from 2’, fine-mist conical tip
3. Let your recoat window close
- The more time you give your floor to cure, the better your end result will be.
- If you are rushed to complete the job, ensure appropriate cleaning to stunt the emissions process.
- Requires about 2 hours to bond without interference from other product’s gassing.
Urethanes / Colorants
Remember – Strength is dependent upon what you are bonding to.
- If you bond to an acrylic urethane, the acrylic can delaminate.
Be cognizant of binders and drivers
- Recommended to use over waterborne colors and sealers.
Solvent based products must chemically cure
- Solvent can re-emulsify if applied too soon. Solutions – Use waterbased product or allow solvent based products cure-time.
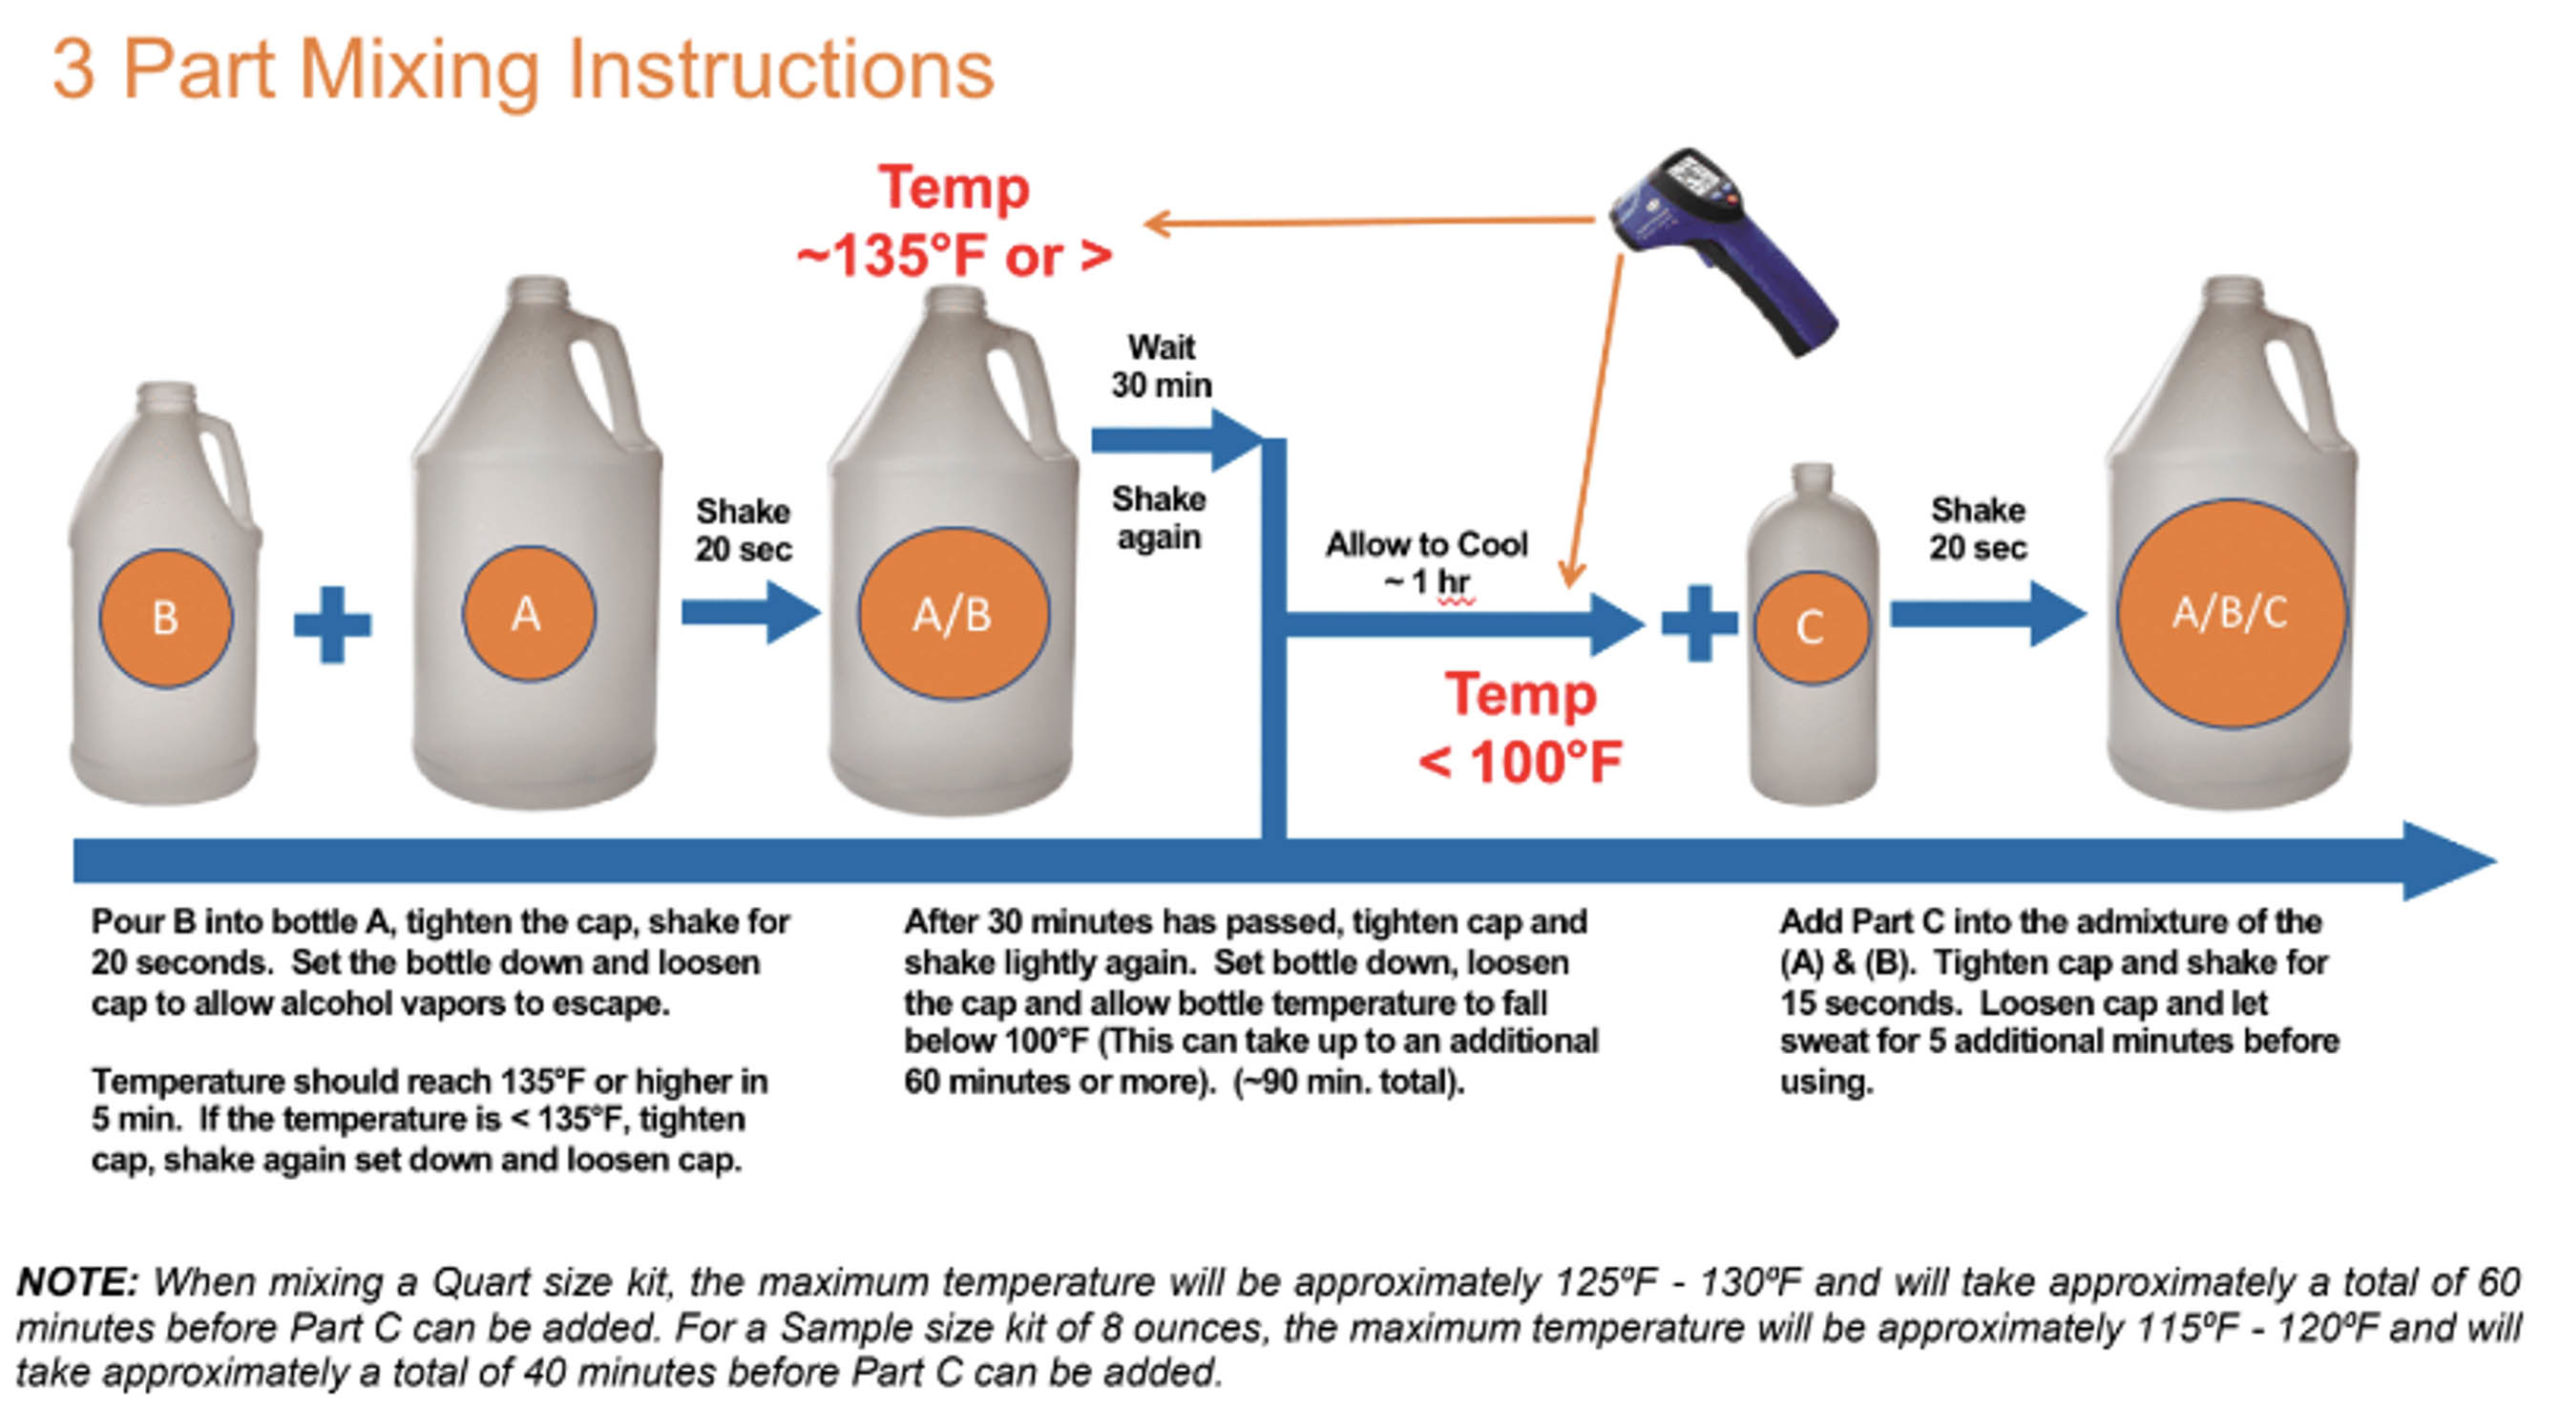
BallistiX Squire & BallistiX NCO Mixing Instructions
Application Method
- Fill garden sprayer with catalyzed product
- Use conical spray tip – SPRAY ABOVE BY 2’ or GREATER
- Porous Substrate:
- Apply evenly dispersed product over entire surface area paying close attention to joints (using cross hatch or circular pattern)
- Spread sprayed product using microfiber flat mot. DO NOT ROTATE MOP HEAD in a FIGURE 8” as it may create swirls
- Be careful to “feather finish” on last stroke of pull
- Tight Substrate:
- Follow with deck pad using “touch and go” method, wall to wall and do not lift or apply pressure.
Apply with the sprayer - not a mop!
- Apply evenly with your sprayer, work in synergy with the mop.
- Do not drag product onto dry ground – simply break the surface tension! Think: Mechanical Vs. Chemical?

Maintenance Procedures
1.Daily remove debris from surface
2.Daily vacuum, sweep and/or dust mop
3.Daily mop floors with hot water mixed with cleaning solution as directed
4.Rinse with hot water and allow to dry
WARRANTY PROTECTION
- NEVER use harsh chemicals or equipment
- NEVER apply other coatings to surface
- ALWAYS follow the above procedures
When surface is in need of a high shine:
- Clean floor with cleaner such as Ameripolish Cleaning Solution using hot water, and buff floor with WHITE pad (highly recommended for better performance)
- Do NOT maintain floor with a Black or Red Pad – extremely unnecessary!
Small Area Remediation of Newly Coated Surfaces
(up to 7 days after application)
- Identify complete area of concern
- See joint lines as guide for area(s) to be repaired
- Apply Yellow Frog Tape or Masking Tape along designated repair area using the joint lines as natural breaks. (Do NOT use Blue Painter’s Tape)
- Carefully wipe area to be repaired with IPA/Denatured Alcohol & towel being very careful not to touch or drip on surrounding coated areas
- Allow alcohol to sit for a few minutes until it evaporates totally
- Use 6-inch Glass & Tile Scrapper on Concrete Substrate OR non-abrasive pad such as Norton Abrasives (epoxy) to remove the old coating
- Vacuum up the coating which should be a fine powder
- Complete a final wipe down of area with IPA/Denatured Alcohol & towel to remove all contaminants
- Using black foam brush & microfiber pad (depending on size of repair), re-apply the product evenly and carefully remove tape no more than 30 minutes after installation
- Create obvious barriers to the area(s) repaired in order to prevent any further damage
Large Remediation Procedures
- Identify complete area of concern
- Use joint lines as your parameters of the area(s) to be repaired
- Apply blue painters tape along designated repair area using the grout lines as natural breaks.
- Carefully wipe area to be repaired with an IPA and towel being very careful not to touch or drip on surrounding coated area
- Dry sand with 60 grit sandpaper any remaining coating for complete removal (2-3 years after application: wet sand with medium sand dollar pad on a 175rpm floor machine)
- Complete a final wipe of area with an IPA towel to remove all debris and dust (unless on tile & grout - remember to insure pH is neutral at 6-8 range)
- Using an appropriate size deck pad style tool, re-apply the product evenly and carefully remove painter's tape
- Create obvious barriers to the area(s) repaired so as to prevent any further damage
Download the In-Depth Overview
Learn more about BallistiX products, solutions, preparation, and application instructions per your needs.
